Kids Crafts!
How To Make A Peg Fairy!
Make a pretty Christmas decoration with a few bits & pieces from round the house!
You will need:
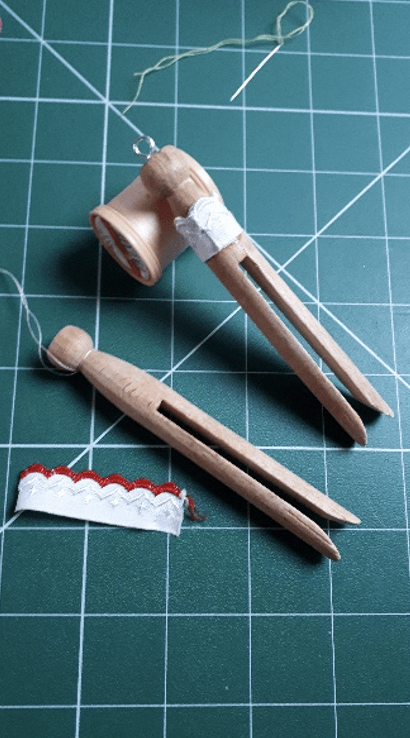
- wooden dolly peg
- screw-in eyelet (optional)
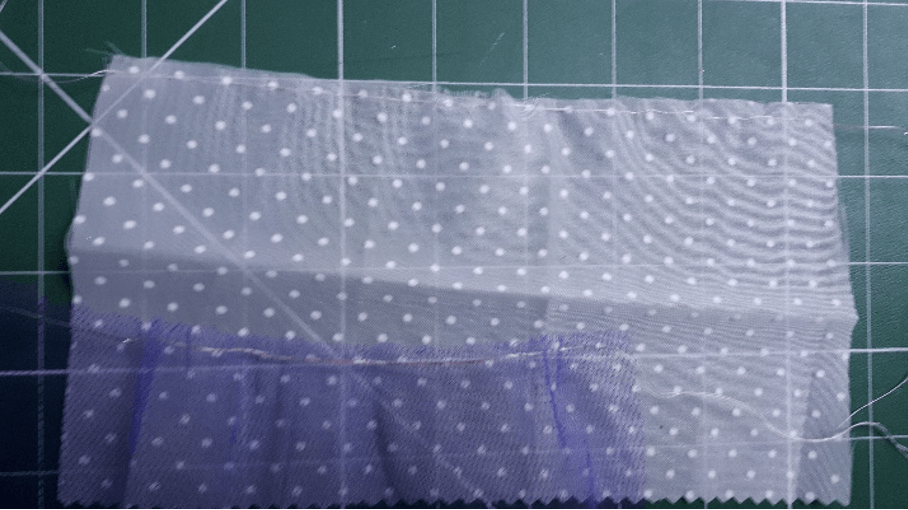
- scraps of material – netting & cloth
- small scraps of lace/edging
- ribbon at least 3cm wide, around 20 cm long
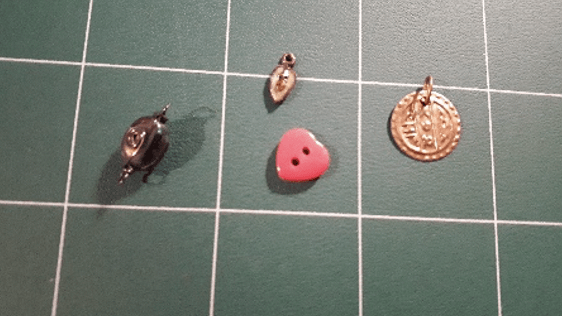
- small beads/buttons/bits of old jewellery/sequins to decorate
- glue, thread and scissors
- Firstly screw the eyelet into the top of the peg, this should be done by an adult as it will involve a sharp pointed tool to make the hole that the eyelet screws into. If you don’t want to involve an adult, wrap some thread beneath the top “head”, tie & create a loop with the rest of the thread & there you have a loop to hang your fairy with.
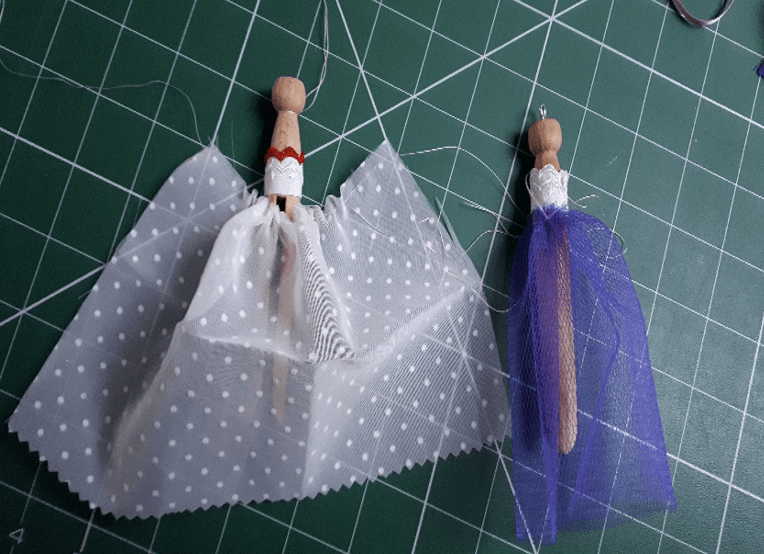
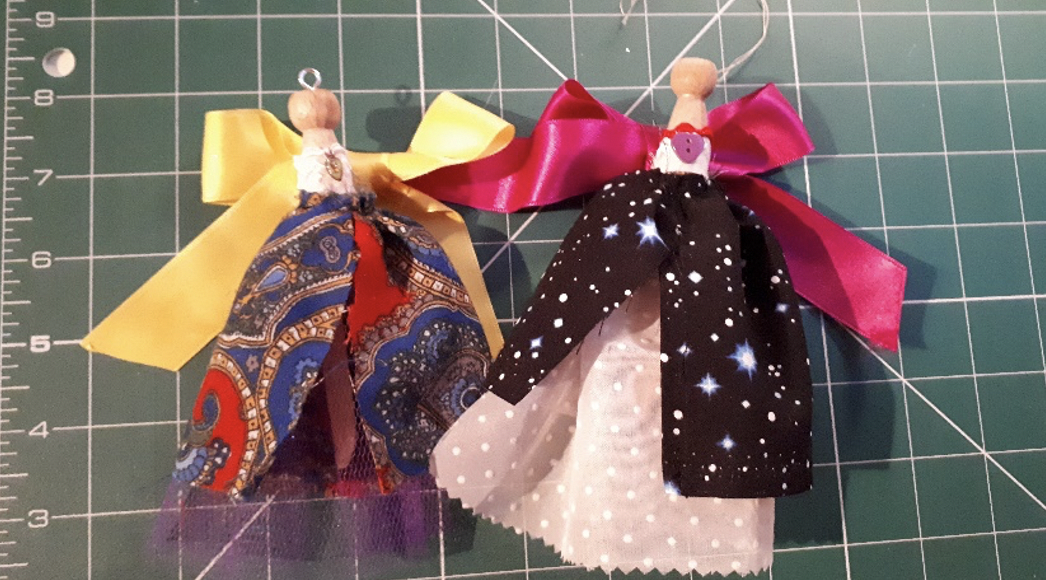
- Bodice! Take your lace and cut a 5cm piece, wrap it round the peg to make a bodice. Overlap the ends and glue them in place at the back.
- Underskirt! Take the netting material & cut a piece about 10 x 20 cm. Sew a running stitch along the top.
- Gather the material & wrap it round the waist of your fairy, with the opening at the back. Tie the thread & glue if the skirt slips.
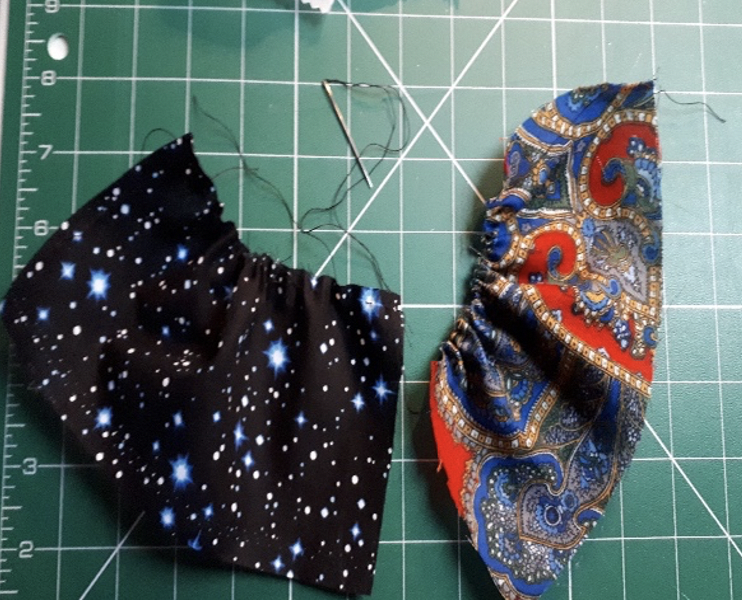
- Overskirt! Cut the other fabric with a slightly smaller depth e.g. 8 x 20 cm. Sew a running stich at the top of the fabric & gather the fabric.
- Wrap this skirt round the fairy so the edges are at the front. Tie the ends of the thread together, and if the skirt slips, use the ends of the thread to tack the skirt in place.
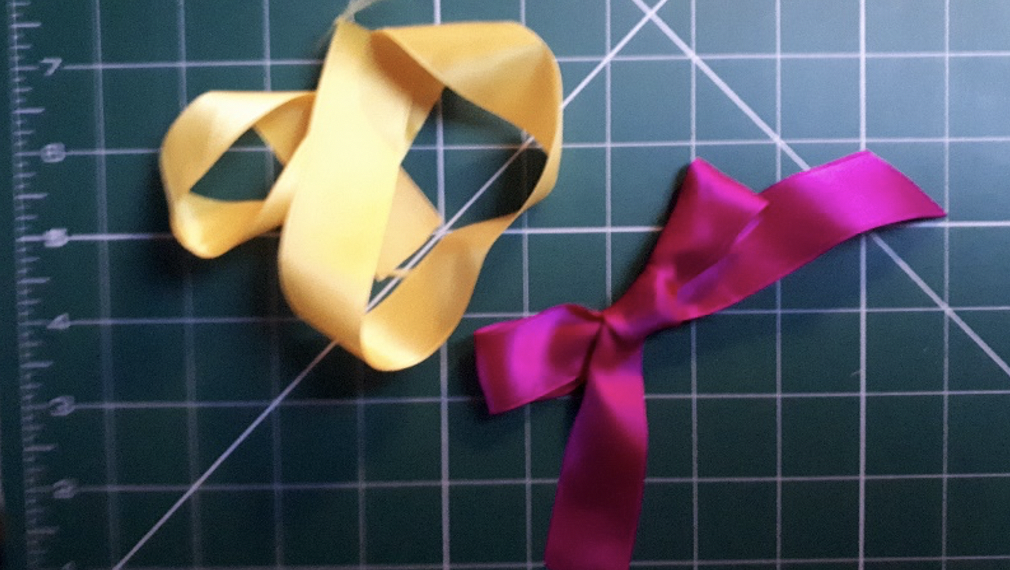
- Wings! Take the ribbon and make a bow.
- Glue the bow onto the back of the fairy. Hold in place to make sure it sticks!
- Finishing touches! Now you can decorate your fairy. You can use what you like, I’ve used buttons & pieces of old jewellery, but you can sew or glue on sequins or beads, go wild!
- You can draw a face. If you have an eyelet, put a piece of very thin ribbon or string through & tie to make a hanging thread. And there is your fairy!